
Contents
When you assess asbestos hazards, you first identify suspect materials such as old insulation, ceiling texture, and damaged floor tile, then confirm them through certified sampling and lab analysis. If test results show friable asbestos, you decide whether removal is required and isolate the area with sealed barriers and negative air pressure. The critical question is what happens next, because one mistake can spread contamination far beyond the work zone.
Key Takeaways
- Identify suspect asbestos in insulation, pipe wrap, ceiling texture, vinyl tiles, and damaged or water-deteriorated materials.
- Confirm asbestos with certified testing; wet a small sample, seal it, and maintain chain of custody for lab analysis.
- Review results for asbestos type, location, and condition, and prioritize removal of damaged or friable materials.
- Contain the area with plastic sheeting, negative air, warning signs, and restricted access before any cleanup begins.
- Use trained professionals, wet removal methods, respirators, disposable PPE, and approved waste disposal with final clearance inspection.
How to Spot Asbestos Hazards
Spotting asbestos hazards starts with knowing where they’re most likely to appear: in older building materials installed before asbestos restrictions took effect.
You should inspect insulation, pipe wrap, vinyl floor tiles, ceiling texture, and cement sheeting, because these common asbestos materials often hide in plain sight.
Use asbestos identification techniques that focus on age, material type, and visible damage, but don’t disturb suspect surfaces. If you see fraying, crumbling, or water damage, treat the area as suspect.
In our shared homes and workplaces, careful observation protects everyone. Stay alert around mechanical rooms, attics, basements, and renovation debris, where fibers can release during wear or impact.
Document what you find, mark the location, and keep others away until a qualified professional evaluates it.
Get an Asbestos Test
You should confirm suspected asbestos with a test, using a vetted home testing kit only if the sample can be collected without disturbance.
For reliable results, you’ll want professional sample analysis, since certified labs can identify asbestos type and concentration with greater accuracy.
Once you receive the report, interpret the findings against material condition and exposure risk so you can decide whether to isolate, repair, or remove the hazard.
Testing Kit Options
Before you disturb any suspect material, get an asbestos test kit or, preferably, hire a certified inspector to collect a sample; a reliable analysis by an accredited laboratory is the only way to confirm whether a product contains asbestos.
For safe DIY testing, choose a kit that includes sealed bags, gloves, a respirator, and clear sampling instructions. You’ll join a community of careful renovators when you follow each step exactly and avoid overhandling brittle material.
- Wet the area lightly.
- Cut a small sample only.
- Seal the sample immediately.
- Label the location precisely.
- Mail it using the provided container.
Select a kit that states compatibility with building materials and preserves chain of custody for lab analysis. Avoid kits without documented procedures.
Professional Sample Analysis
A certified asbestos inspector can collect the sample and submit it for professional analysis, giving you the most defensible result when material identification matters for renovation or demolition planning.
You’ll benefit from controlled sample collection, because trained personnel know how to isolate the suspect material, prevent cross-contamination, and package it under chain-of-custody controls.
In the lab, technicians follow standardized lab procedures, typically using polarized light microscopy or another approved method, to identify asbestos fibers in the material matrix.
That process gives your project team a reliable technical record and helps you work with confidence inside a compliant, safety-focused community.
When you need certainty, professional analysis gives you the documentation and discipline that DIY testing can’t match for regulated work.
Interpreting Test Results
Once the lab returns your asbestos test, read the result in context: the report should identify the sampled material, the method used, and whether asbestos was detected, along with the fiber type and estimated percentage if present.
You need to match the finding to the material’s location and condition, because friable materials elevate health risks fast. Verify the asbestos types named, such as chrysotile, amosite, or crocidolite, since control measures differ by fiber.
- Confirm sample ID and chain of custody
- Check method, often PLM or TEM
- Note positive, negative, or trace results
- Compare asbestos types with the material
- Decide if repair, enclosure, or removal fits your team’s plan
Which Asbestos Materials Need Removal?
Which asbestos-containing materials need removal depends on their condition, friability, and likelihood of disturbance. You should remove damaged, crumbling, or waterlogged materials because they release fibers readily and raise exposure risk for everyone in your home or facility.
Prioritize asbestos insulation, pipe wrap, spray-applied fireproofing, and deteriorated vinyl flooring when they’re broken, delaminated, or sanded. You can often leave intact, nonfriable materials in place if they’re sealed, undisturbed, and regularly inspected by a qualified professional.
But if renovation, maintenance, or vibration will disturb them, removal usually becomes the safer control. You’ll protect your household and workers by treating suspect materials as hazardous until verified otherwise.
Always base the decision on assessment data, not appearance alone.
How to Seal Off the Work Area
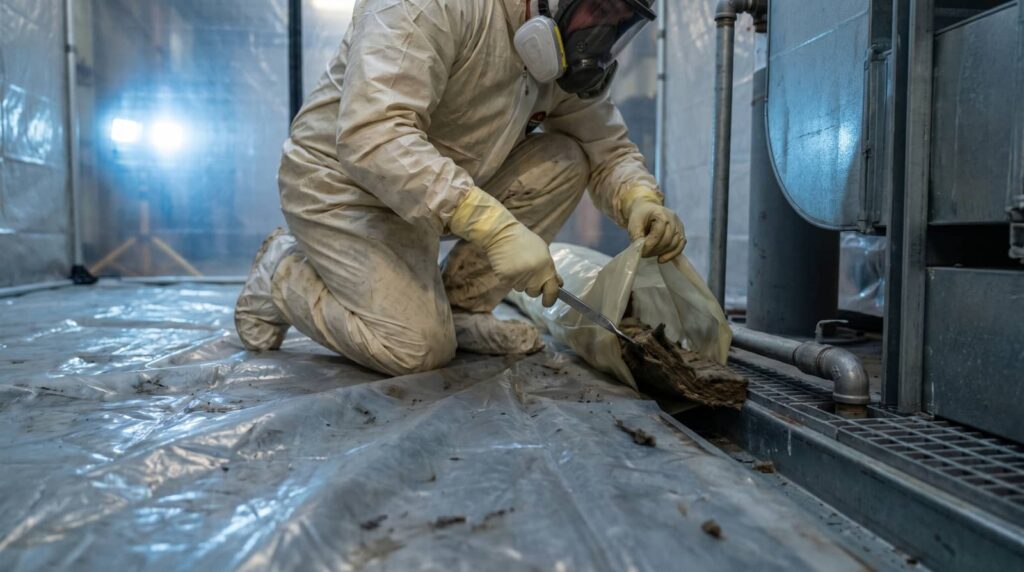
You seal off the work area with continuous plastic sheeting barriers that fully isolate the contaminated zone from adjacent spaces.
You maintain negative air pressure with properly positioned HEPA-filtered equipment so airborne fibers stay contained within the enclosure.
You control entry points with sealed access routes and decontamination procedures to limit disturbance and prevent fiber migration.
Plastic Sheeting Barriers
A secure plastic sheeting barrier is the primary defense against asbestos fiber migration during cleanup or removal work. You should use it as a core element in your containment strategies, because barrier effectiveness depends on complete coverage and tight seams.
You’ll fit 6-mil polyethylene over floors, walls, doors, and vents, then tape every overlap with approved sealant. Keep penetrations, corners, and floor edges fully enclosed. Inspect for tears before you enter the work area, and replace damaged sections immediately.
Your crew belongs in a controlled zone, so mark the boundary clearly and restrict access.
- Cover all exposed surfaces
- Overlap seams by several inches
- Seal joints with compatible tape
- Reinforce stress points at corners
- Verify fit before disturbing materials
Negative Air Pressure
Negative air pressure keeps asbestos fibers from escaping the sealed work area by pulling air inward instead of letting contaminated air leak out.
You create this pressure differential with properly sized exhaust units that run continuously during abatement. Verify airflow management by checking gauges, hoses, and filter performance before you begin, then confirm the room stays under negative pressure throughout the job.
When you belong to a trained crew, you protect each other by keeping the containment stable and the work zone isolated. If the gauge drops, stop work and correct the system immediately.
Maintain sealed barriers, tight seams, and a controlled exhaust path so contaminated air stays inside until filtration removes the hazard.
Entry Point Controls
With negative pressure established, control every entry point so contaminated air can’t escape when workers move in and out. You’ll seal the work area with critical barriers, protect the crew, and keep hazard identification disciplined at each opening.
Install zippered decontamination flaps at all entry points.
Tape seams on poly sheeting and inspect for tears.
Build a clean access zone for donning and doffing.
Post warning signs to restrict unauthorized access.
Use tack mats and waste bags at exits.
You should keep traffic one-way, limit door openings, and verify seals before work starts. If a barrier fails, stop and repair it immediately.
Your team stays safer when every entry point is controlled, documented, and checked during each shift.
Remove Asbestos Safely
Removing asbestos safely requires strict containment, controlled work practices, and proper disposal. You must treat the work area as a regulated zone and keep your team aligned on each step.
Use approved asbestos removal techniques that minimize fiber release, including wet methods, low-disturbance handling, and sealed waste packaging. Wear the right safety equipment: a properly fitted respirator, disposable coveralls, gloves, and boot protection.
You should isolate materials, avoid breaking them, and use tools that limit dust generation. If you’re trained, follow your written plan exactly and stop if conditions change.
Keep materials damp, double-bag debris, and label containers clearly. Work methodically, because disciplined execution protects you, your crew, and everyone who relies on your professionalism.
Confirm the Site Is Clear
Before anyone re-enters, you must verify that the work area is fully decontaminated and that no visible debris, dust, or damaged material remains.
During the final site inspection, check floors, ledges, HVAC returns, and containment barriers with bright lighting and approved wipes. Your hazard assessment should confirm that air controls stayed intact and that cleanup crews removed all regulated waste.
- Inspect sealed bags and labeled waste staging.
- Review negative-pressure readings and clearance records.
- Confirm tools, PPE, and filters are removed.
- Document any residual dust or suspected fiber release.
- Release the site only after supervisor sign-off.
When you follow this process, you help protect your crew and reinforce a shared standard of safety.
Frequently Asked Questions
How Do I Know if I Need Professional Asbestos Removal?
You need professional asbestos removal if you suspect friable material, damage, or renovation exposure; asbestos testing methods can confirm it. Because the health risks are serious, you shouldn’t disturb it—you’ll protect your home’s safety.
What Protective Gear Should I Wear Near Suspected Asbestos?
You should wear protective equipment like a sealed P100 respirator, disposable coveralls, gloves, and boots, as if you’re entering quarantine. Follow safety protocols strictly; you’ll protect yourself and stay aligned with trained crews.
How Long Does Asbestos Disposal Usually Take?
You’ll usually spend a few hours to several days on asbestos disposal, depending on material volume, disposal methods, and site rules. Your cleanup timeline can stretch longer if testing, containment, or licensed transport is required.
Can Asbestos Be Safely Left Undisturbed in Place?
Yes—you can often leave asbestos undisturbed, like sealed ice beneath paint, if it’s intact. You’ll need asbestos safety controls, clear labeling, and long term monitoring so you stay protected and informed together.
What Permits Are Required Before Asbestos Cleanup?
You’ll usually need local asbestos permits and notification under asbestos regulations before cleanup; licensed abatement work may also require waste-transport and disposal approvals. You should verify cleanup procedures with your environmental agency and building authority.
Recap
You’ve now mapped the danger, tested the suspect materials, and sealed off the scene like a forensic crime unit. If the asbestos is friable, you remove it with disciplined containment, proper respirators, and waste handling that treats every fiber like a hostile witness. Then you verify the site is clean, because “probably safe” isn’t a legal standard or a health plan. In this work, precision isn’t optional; it’s the only thing standing between order and airborne regret.
Recent Posts
3 Tips for Vehicle Drug Decontamination
Most contaminated-vehicle response failures start with poor scene preparation, not the cleanup itself. Vehicle Drug
7 Tips for Cost-Effective Asbestos Removal
Many U.S. workers still face asbestos exposure risks, which makes careful removal planning essential. Cost-Effective
Affordable Asbestos Testing and Safe Removal
Older homes may contain asbestos, so you can’t assume your property is clear without testing.