
Contents
More than one in three drug-related decontamination cases involve hidden residue on surfaces you can’t see at a glance. Fentanyl and Meth Cleanup should begin with inspecting high-touch areas, porous materials, and HVAC pathways for visible contamination, odors, and sticky films. From there, validated swab testing and clearance checks can help assess potential risks. The real question is which findings mean the site is unsafe and when professional cleanup is required before reentry.
Key Takeaways
- Inspect air, dust, porous surfaces, and high-touch areas for visible residue, stains, scorch marks, or odors.
- Prioritize limited-ventilation rooms, HVAC pathways, and areas near drug use or storage points.
- Use validated surface swab testing on representative high-touch and porous surfaces, following kit instructions exactly.
- Treat any positive or uncertain results as contaminated until professional cleanup and clearance testing confirm safety.
- Before reentry, document cleanup, waste disposal, lab results, and HVAC checks, then post clear occupancy guidance.
Identify Fentanyl and Meth Exposure Risks
Before you assess a property for fentanyl or meth contamination, you need to identify where exposure is most likely to occur.
You should evaluate air, dust, porous surfaces, and high-touch items because these exposure pathways can deliver residue to occupants, workers, and responders.
Prioritize rooms with limited ventilation, shared HVAC returns, and spaces where people spend extended time, since dose can accumulate there.
You also need to take into account occupant vulnerability, including children, older adults, and anyone with respiratory conditions, because health effects can vary with sensitivity and exposure duration.
Use a structured risk review to map likely contact points, inhalation zones, and contamination transfer routes.
This approach helps you work confidently, protect your team, and support everyone who depends on the property.
Check for Visible Drug Contamination
After you’ve mapped likely exposure areas, inspect each space for visible signs of contamination that can confirm or refine your assessment. You should scan with a systematic eye, noting visual indicators such as powder, crystals, scorch marks, stained packaging, or residue on high-touch surfaces.
Focus on contamination sources that cluster near drug use, storage, or preparation points, including counters, drawers, vents, and floor edges. Record what you see without disturbing debris, because movement can spread particles and blur your findings.
- White or off-white residue on tabletops
- Burned foil, pipes, or improvised tools
- Sticky stains, broken baggies, or chemical odors
These observations help you and your team stay aligned, reduce guesswork, and decide where cleanup must proceed next.
Test Surfaces for Fentanyl Residue
You should use validated surface swab methods to collect residue from high-touch areas, following the kit’s contact time, sample area, and handling instructions.
After collection, you’ll compare the swab result to the test’s detection threshold and any control samples to confirm whether fentanyl is present.
A positive result indicates residue on that surface, while a negative result doesn’t rule out contamination below the assay’s limit of detection.
Surface Swab Methods
Surface swab methods provide a direct way to check whether fentanyl residue remains on frequently touched areas, such as countertops, doorknobs, bathroom fixtures, and ventilation surfaces.
You should follow standardized swab techniques so each sample reflects the same contact area and pressure. Use clean, labeled swabs, and keep to contamination protocols that prevent cross-contact between rooms or surfaces.
Collect samples from high-touch points, edges, and seams where particles can settle.
- Wear gloves and change them often.
- Swab one surface at a time.
- Seal each sample immediately.
This approach helps you build a clear, shared record of site conditions. You can compare locations consistently and keep your cleanup workflow organized, disciplined, and credible without adding unnecessary complexity.
Interpreting Test Results
Result data should be read in context, because a positive surface swab only confirms that fentanyl residue is present on the sampled area, not how much contamination remains across the site. You should compare each result with the sampling map, chain of custody, and lab detection limits before you draw conclusions.
In test interpretation, a negative result doesn’t prove the area is clean; it only means the sample didn’t detect residue above the method threshold. For risk assessment, you should weigh surface location, occupancy, ventilation, and visible debris alongside the data.
If results vary between nearby swabs, treat the pattern as evidence of uneven contamination and resample targeted zones. This approach helps you and your team make consistent cleanup decisions.
Check for Meth Contamination Hazards
Check for meth contamination hazards by inspecting areas where residue, fumes, or chemical byproducts may have settled, especially on porous materials, HVAC components, and hidden contact points such as walls, ceilings, and cabinetry.
Use meth detection techniques to confirm contamination indicators before you classify a space as safe. Focus on discoloration, sticky films, unusual odors, and surface staining, since these signs often signal residual exposure. You belong in a process that values evidence, not guesswork.
- Examine trim, switches, and corners under bright light.
- Sample porous surfaces where contamination can persist.
- Document any visible residue or damaged finishes.
If hazards appear, treat the area as contaminated until qualified testing verifies cleanup.
Check HVAC for Hidden Contamination
Because HVAC systems can move contamination beyond the obvious cleanup zone, you should inspect ducts, returns, registers, filters, coils, and air-handling units for trapped residue, dust buildup, and chemical transfer.
You’ll want to document visible staining, unusual odors, and any debris that indicates circulation of contaminants through the system.
Check whether filters need replacement and whether access panels, plenums, and fan compartments show signs of spread.
If you detect residue, isolate the system until qualified remediation confirms safe operation.
You can then verify air quality with appropriate sampling or clearance testing, based on the scope of contamination and local protocol.
When you assess HVAC systems carefully, you help protect everyone who’ll reoccupy the space and reduce the chance of hidden exposure returning after cleanup.
Assess Walls, Floors, and Soft Materials
Next, inspect walls, floors, and soft materials for residue that may have settled, absorbed, or spread during contamination and cleanup.
You should examine paint, drywall, trim, and seams for discoloration, tacky films, or damage that affects wall integrity.
Check floor materials such as vinyl, tile, sealed concrete, and grout for staining, pitting, or trapped debris in joints.
Review rugs, drapes, upholstery, and bedding for odor, visible residue, or fibers that hold contamination.
- Trace edges where walls meet floors.
- Note wear in high-contact areas.
- Record any material that can’t be cleaned in place.
When you stay methodical, you protect shared spaces and support a safer, more informed response.
Decide When Professional Cleanup Is Needed
If you find widespread residue, persistent odors, damaged porous materials, or contamination in seams, joints, or soft furnishings that you can’t reliably clean in place, you should treat the area as requiring professional cleanup.
You’ll usually need trained technicians when contamination covers multiple rooms, penetrates hidden surfaces, or involves HVAC pathways. In those cases, you can’t depend on routine household methods to restore conditions to accepted professional standards.
Professional teams follow cleanup protocols that control spread, protect workers, and remove affected materials with the right containment and disposal practices.
If you’re unsure whether the contamination is localized or systemic, choose escalation rather than partial effort. That decision helps you stay aligned with the same careful approach used by experienced remediation crews, and it keeps your response consistent with the expectations of a well-prepared team.
Understand Clearance Tests and Safety Rules
Clearance tests verify whether cleanup has reduced contamination to acceptable levels before reentry or reuse. You should use clearance procedures that match the contaminant, surface type, and local requirements. A qualified assessor collects samples, documents methods, and compares results with accepted thresholds.
You’ll know the site is closer to safe occupancy when data are consistent and defensible.
- Verify that testing covers representative rooms and high-touch surfaces.
- Confirm chain-of-custody and lab methods before you rely on results.
- Follow safety precautions during sampling, including PPE and controlled access.
If results exceed limits, you need another cleaning cycle and retesting.
When you work with trained professionals, you strengthen trust, reduce risk, and help everyone share the same standard for a safe environment.
Get the Property Ready for Reentry
Once clearance testing shows the site meets acceptable limits, you can prepare the property for controlled reentry.
You should confirm that all remediation records, waste manifests, and final laboratory results are organized and accessible.
Inspect HVAC systems, surfaces, and entry points to verify that no residual contamination or damage remains.
Restore utilities only after you document that each system supports property safety.
Post reentry guidelines at access points so occupants, contractors, and responders understand approved areas, protective actions, and reporting steps.
Remove warning signs only when the site manager authorizes occupancy.
Before anyone returns, walk the property with the responsible team, review turnover conditions, and explain any restrictions.
Clear communication helps everyone feel informed, included, and ready to reenter with confidence.
Frequently Asked Questions
How Long Do Fentanyl Residues Remain Dangerous After Contamination?
Fentanyl residues can remain dangerous for days or longer, depending on surface, humidity, and cleanup quality. You should treat contamination duration as unpredictable; fentanyl persistence means you’ll need proper testing and decontamination before reentry.
Can Pets Detect Hidden Meth Contamination in a Property?
Yes—your pets might notice hidden meth contamination through unusual behavior, but you shouldn’t rely on them. Use trained canine detection and inspect contamination signs; you’ll get a more objective, technically sound assessment.
What Protective Gear Should Cleanup Workers Wear?
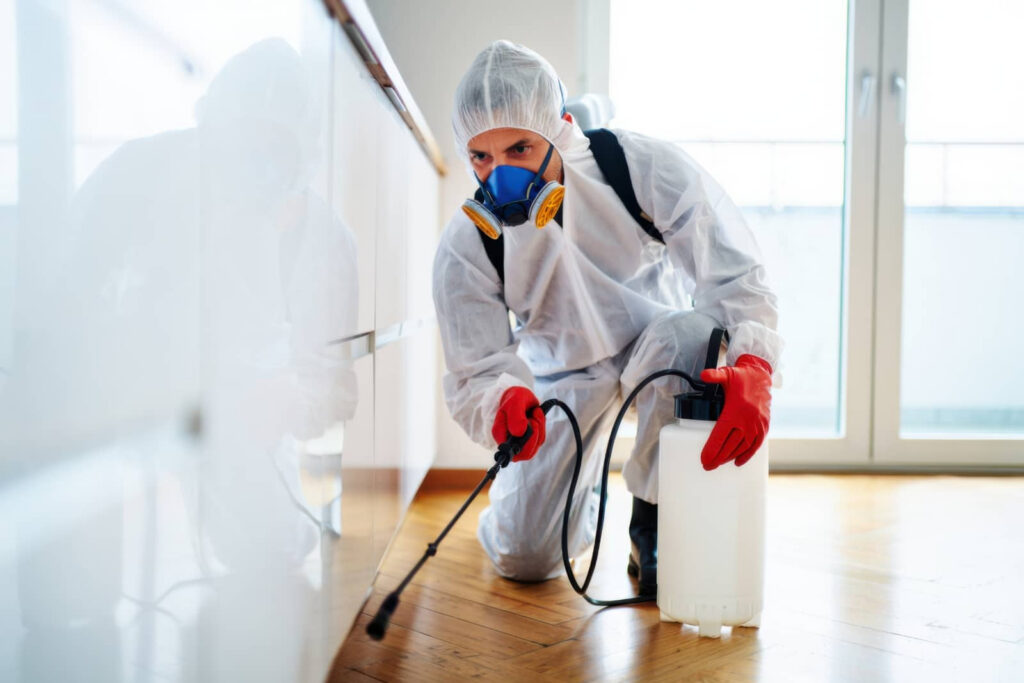
You should wear gloves, eye protection, respirator, disposable coveralls, and boot covers. Follow cleanup protocols and safety measures, then remove and discard gear safely. You’ll protect yourself and support your team’s shared standards.
Are Smoke Odors Linked to Fentanyl or Meth Contamination?
Not necessarily; you should use smoke analysis to separate odor sources, since smoke odors may come from many materials. You’ll need environmental sampling and lab confirmation to determine whether fentanyl or meth contamination is present.
How Often Should Contaminated Properties Be Retested?
You should retest only when contamination guidelines, not optimism, say so; your retesting frequency usually follows initial cleanup, tenant turnover, repairs, or exposure concerns, and you’ll protect your community by documenting each result precisely.
Wrap-Up
When you finish assessment, let the space speak like a sealed instrument: if surfaces are clean, odors are absent, and clearance results meet threshold, the property can turn from a warning sign into a safe marker again. You should rely on verified testing, documented decontamination, and professional judgment, not assumptions. Keep protective controls in place until every sample passes. That’s how you move from uncertainty to reentry with confidence and technical certainty.
Recent Posts
Why Decontaminate Vehicles After Fentanyl Exposure?
You may not realize that fentanyl residue can hide in HVAC ducts, seams, and under
3 Tips for Vehicle Drug Decontamination
Most contaminated-vehicle response failures start with poor scene preparation, not the cleanup itself. Vehicle Drug
7 Tips for Cost-Effective Asbestos Removal
Many U.S. workers still face asbestos exposure risks, which makes careful removal planning essential. Cost-Effective